FTP Web Site Set-up Instructions
All students are entitled to Web space on the ouray server run through the
ITS
(13th Floor Lawrence Street Center - 556-6100).
-
 Your
accounts are set up for you upon enrollment - If you already have an ouray
email address you use the same username and account number for your Web site.
If not:
- Activate your account online at
https://web.ucdenver.edu/prfw/chpass.cgi and click on “Student Account
Activation Form.”
- Enter your Student ID number and PIN, and follow the instructions.
- Upon activation, you will receive a username and password.
- Once you have set-up your ouray account you need to create a Web directory
on the ouray server. To do this you will need to log into ouray using a
secure telnet protocol called "SSH".
- Download putty.exe
from:
http://www.chiark.greenend.org.uk/~sgtatham/putty/download.html
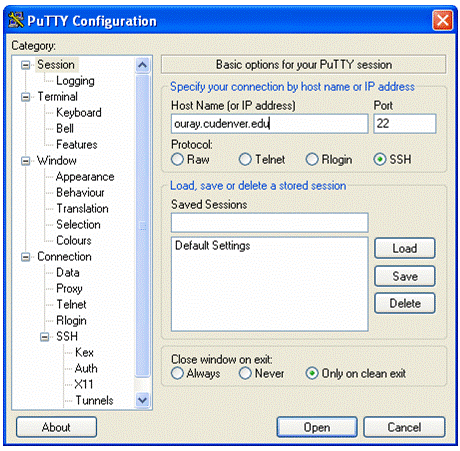
- Start
putty.exe by double clicking on it.
- Set your Host name to be:
ouray.ucdenver.edu
- Set your protocol to
"SSH"
- Enter your ouray username and password when prompted to do so.
Password:
********
Once connected to ouray type:
makehomepage
- Remember - when logging onto ouray, you need to include exact capitalization and punctuation for your password to
work!
- You can download a free SFTP program
WinSCP to use to
sftp your files if you are on a Windows machine (for Macs download
Cyberduck).
- Install the SFTP program just like you would any other program.
- You can choose the defaults for most of the Installation options.
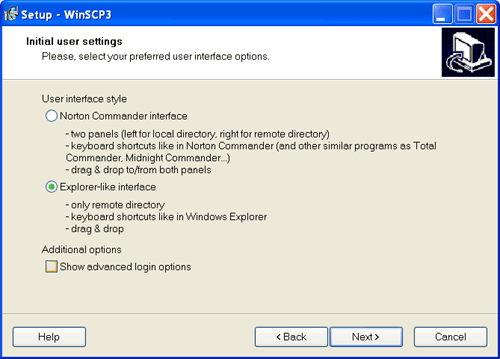
- One option I change is I usually select that I want to use the
"Explorer-like" interface. This makes the WinSCP window work very much
like one of the folders on your regular computer.
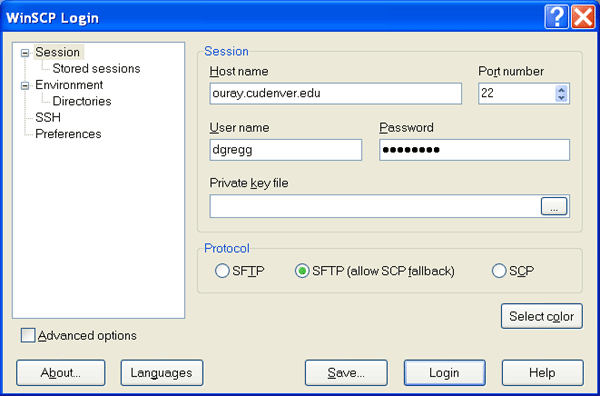
- Once you have a SFTP program installed you log onto your web site on ouray
by filling in appropriate values for the Hostname, User name, and Password -
then {Click} Login:
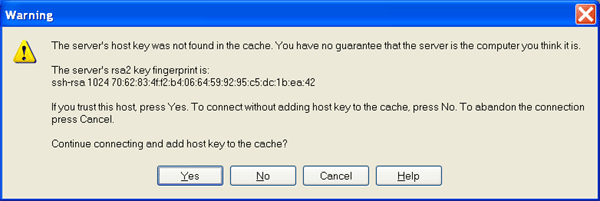
- Note: I got this error box (below) when I logged in for the first time.
It is OK - just click "Yes" and continue:
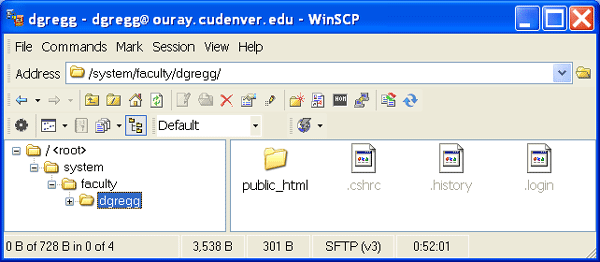
- The SFTP window looks like this:
-
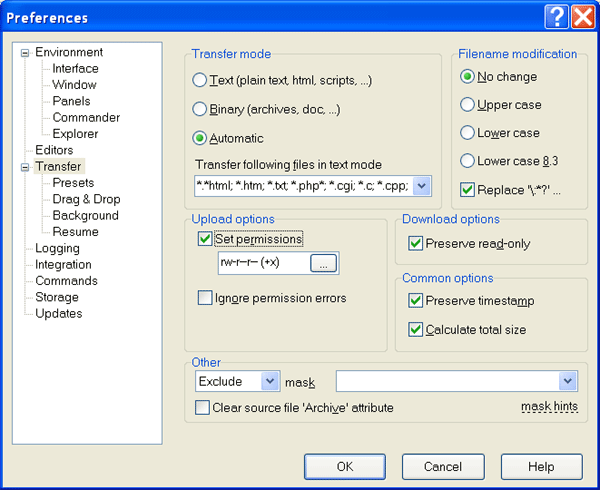 Before
you upload any files you will want to change the file transfer preferences so
any files you upload can be browsed via the Internet. To do this:
- Select View - > Preferences from the top menu
- Choose "Transfer" from the tree on the left side of the dialog box.
- Check "Set Permissions" below "Upload Options" on the right side
of the dialog box.
- Make sure the permissions read "rw-r--r-- (+x)"
- Click OK
- To add files to you web site double-{Click} the public_html
folder, then drag and drop the files into the folder (in the right-side of the
window above).
- Remember to drag & drop all of the files associated with your Web page.
For example:
- index.html
- image1.gif
- image2.jpg
- If you have your images in a separate "images" folder - you can drag the
whole folder to the public_html folder.
- Your web page can be viewed at:
http://ouray.ucdenver.edu/~username/pagename.html
 Your
accounts are set up for you upon enrollment - If you already have an ouray
email address you use the same username and account number for your Web site.
If not:


 Before
you upload any files you will want to change the file transfer preferences so
any files you upload can be browsed via the Internet. To do this: